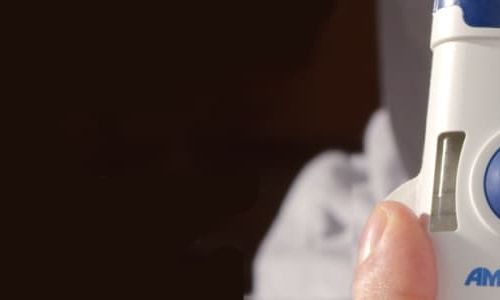
MAN HOLDING MINI-DOSER MAN HOLDING MINI-DOSER

How to use the automated mini-doser

Here are the main steps of using the automated mini-doser.

Once you have been trained to administer Repatha®, please refer to the Patient Medication Information leaflet that comes with your Repatha® medication for step-by-step instructions and helpful illustrations.

Ask your doctor if you have any further questions on how to use Repatha®.

Summary of the main steps

MAN EXAMINES AUTOMATED MINI-DOSER BOX WHILE STANDING IN FRONT OF FRIDGEMAN EXAMINES AUTOMATED MINI-DOSER BOX WHILE STANDING IN FRONT OF FRIDGE

Step 1: Prepare

  • Remove the mini-doser and prefilled cartridge carton from the refrigerator. Wait 45 minutes for the automated mini-doser and prefilled cartridge to naturally reach room temperature.
  • Open the carton and peel away the white paper cover. Remove the mini-doser cover from the clear tray when you are ready to inject.
  • Gather all materials needed for your injection: alcohol wipes, cotton ball or gauze pad, adhesive bandage, sharps disposal container.
  • Wash your hands thoroughly with soap and water.
  • Prepare and clean your injection site with an alcohol wipe. To attach the mini-doser securely, it is important to use a firm and flat skin surface that is less likely to have body hair.
    • You can use: thigh, stomach area (abdomen) except for a two-inch area around the navel, outer area of upper arm (if someone else is giving the injection).

MAN SWABBING HIS STOMACH AREAMAN SWABBING HIS STOMACH AREA

Step 2: Get ready

  • Open the mini-doser by swinging the cartridge door to the right.
  • Leave the door open. Do not close the cartridge door before the cartridge is loaded.
  • Inspect the cartridge to make sure the medicine in the window is clear and colourless to slightly yellow. Check the expiration date.
  • Clean the cartridge bottom with an alcohol wipe.
  • Load the cleaned cartridge, bottom first, into the mini-doser. Firmly press on the top until it is secured in place.
  • Swing the door to the left and squeeze firmly until it snaps shut.
  • Proceed to the next step without delay.

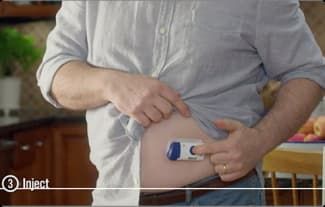
MAN PRESSES BUTTON ON MINI-DOSERMAN PRESSES BUTTON ON MINI-DOSER

Step 3: Inject

  • Peel away both green pull tabs to show the adhesive. The automated mini-doser is ON when the blue status light flashes.
  • Choose your mini-doser injection site.
    • Only use the outer arm if someone else is giving the injection.
    • If using the belly, stretch the skin to create a firm surface.
    • Do not stretch for the thigh or outer arm.
  • When the blue light flashes, hold the loaded automated mini-doser with the blue light visible and place it on your skin. You may hear beeps. Make sure the adhesive is secured.
  • Firmly press and release the start button. A flashing green light and a click signals the injection has started.
  • The injection takes about 5 minutes. When the status light turns solid green and the automated mini-doser beeps, the injection is complete.

SHARPS DISPOSAL CONTAINER ON TABLESHARPS DISPOSAL CONTAINER ON TABLE

Step 4: Finish

  • When the injection is done, pull carefully on the skin adhesive to peel the automated mini-doser off the skin.
  • After removal, check the medicine window. The used plunger should completely fill the medicine window. The green light should now be off, letting you know the medicine has been injected.
  • Discard the used automated mini-doser in a sharps disposal container.
  • Examine the injection site. If there is blood, press (do not rub) a cotton ball or gauze pad on the injection site. Apply a bandage if needed.

What if the loaded automated mini-doser status light continuously flashes red and I hear beeps?

The injection will automatically stop. Carefully remove the automated mini-doser from your body. DO NOT attempt to re-use this automated mini-doser.

What should I do if the automated mini-doser comes off my body during the injection?

Although this is unlikely to happen, the injection will stop and you will see a blinking red light and hear beeps. DO NOT attempt to re-use this automated mini-doser.

What if I push the start button before I place the automated mini-doser on my skin?

If you have removed the adhesive backing and pressed the start button, the automated mini-doser will beep and you will see a blinking red light. The automated mini-doser will not inject. Stop using this automated mini-doser.

What if the automated mini-doser does not beep and the blue status light does not blink when I remove the pull tabs?

Check to see if both paper pull tabs have been fully removed from the automated mini-doser, including the paper over the battery strip and needle cover. If both pull tabs have been fully removed and the automated mini-doser still does not turn on, use a new automated mini-doser and prefilled cartridge.

What if I push the start button and nothing happens?

Remove the automated mini-doser by slowly and carefully peeling it away from your skin. Do not reapply the same automated mini-doser.

What if I cannot open the cartridge door to insert the cartridge?

To open the automated mini-doser door, press on the left side of the door to release the door latch. If you are still unable to open the door, call 1-888-Repatha (1-888-737-2842) or visit repatha.ca.

Patient Support Program

HDL-C=high-density lipoprotein cholesterol; LDL-C=low-density lipoprotein cholesterol
Please note: Your Repatha® package may be different from that shown.

Do you have questions?

Connect with the Amgen Canada Medical Information team for help by phone at 1-866-502-6436 or email at medinfocanada@amgen.com.